Hey there! I’m a supplier of Multi Function Meters, and I’m here to walk you through how to install a Multi Function Meter for sub – metering. It might seem a bit daunting at first, but with the right steps and a bit of know – how, you’ll have it up and running in no time. Multi Function Meter
Why Sub – metering?
Before we dive into the installation process, let’s quickly talk about why sub – metering is important. Sub – metering allows you to measure and monitor the energy consumption of specific areas or equipment within a larger electrical system. This can help you identify energy – hungry devices, manage costs, and make more informed decisions about energy usage. Whether you’re a building manager, an industrial operator, or just a homeowner looking to be more energy – efficient, sub – metering is a great tool.
What You’ll Need
First things first, gather all the necessary tools and materials. You’ll need:
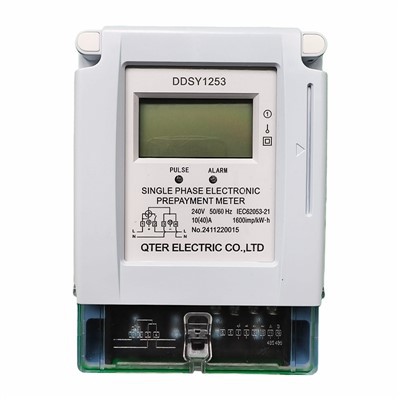
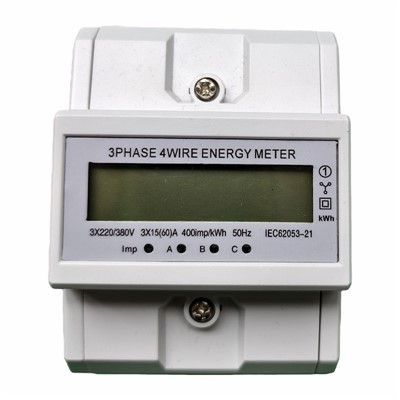
- A Multi Function Meter: Of course, you can get this from us, your trusted supplier.
- Screwdrivers: Both flat – head and Phillips – head, depending on the mounting and connection requirements.
- Wire strippers: To strip the insulation off the electrical wires.
- Electrical tape: To insulate the connections and prevent any short – circuits.
- Mounting hardware: Such as screws and brackets to securely attach the meter to the wall or panel.
- A voltage tester: To ensure the power is off before you start working on the electrical connections.
Step 1: Plan Your Installation
Before you start any physical work, take some time to plan out where you’ll install the Multi Function Meter. Consider the following:
- Location: Choose a location that is easily accessible for reading the meter and performing maintenance. It should also be away from any sources of heat, moisture, or physical damage.
- Wiring: Determine the best way to route the electrical wires from the power source to the meter. Make sure you have enough wire length to reach the meter without any tension.
- Safety: Ensure that the area where you’ll be working is safe. Turn off the power to the circuit you’ll be working on and use a voltage tester to confirm that the power is off.
Step 2: Mount the Meter
Once you’ve planned your installation, it’s time to mount the meter. Here’s how:
- Use the mounting hardware to attach the meter to the wall or panel. Make sure it’s level and securely fastened.
- If you’re mounting the meter in a panel, ensure that there is enough space around it for ventilation and easy access to the connections.
Step 3: Connect the Wires
This is the most critical part of the installation process. Follow these steps carefully:
- Identify the incoming power wires. Usually, there will be a live wire (usually brown in the UK or black in the US), a neutral wire (usually blue in the UK or white in the US), and an earth wire (usually green and yellow).
- Use the wire strippers to strip about 1 – 2 cm of insulation from the ends of the wires.
- Connect the live wire to the appropriate terminal on the meter. The terminal will usually be labeled "L" or "Line".
- Connect the neutral wire to the neutral terminal, labeled "N".
- Connect the earth wire to the earth terminal, usually marked with an earth symbol.
- Double – check all the connections to make sure they are tight and secure. Use electrical tape to insulate the connections and prevent any short – circuits.
Step 4: Configure the Meter
After the physical installation is complete, it’s time to configure the meter. This involves setting up the meter to measure the specific parameters you’re interested in, such as voltage, current, power, and energy consumption.
- Refer to the meter’s user manual for detailed instructions on how to configure the settings.
- You may need to set the meter’s measurement units, time settings, and other parameters according to your requirements.
- Some meters can be configured using a computer or a handheld device. If this is the case, follow the instructions provided by the manufacturer to connect the meter to the device and make the necessary adjustments.
Step 5: Test the Meter
Once you’ve configured the meter, it’s time to test it to make sure it’s working properly.
- Turn on the power to the circuit and check the meter’s display. You should see readings for voltage, current, power, and energy consumption.
- Compare the readings on the meter with other known values or measurements to ensure accuracy.
- If you notice any issues or discrepancies, double – check the connections and settings, and refer to the meter’s user manual for troubleshooting tips.
Step 6: Monitor and Maintain
After the installation and testing are complete, it’s important to monitor the meter regularly to ensure it continues to function properly.
- Check the meter’s display periodically to track energy consumption and identify any trends or anomalies.
- Perform regular maintenance on the meter, such as cleaning the display and checking the connections for tightness.
- If you encounter any problems with the meter, contact us, your Multi Function Meter supplier, for support and assistance.
Conclusion
Installing a Multi Function Meter for sub – metering is a relatively straightforward process if you follow the steps outlined above. By sub – metering, you can gain valuable insights into your energy consumption and take steps to improve energy efficiency and reduce costs.
Prepaid Energy Meter If you’re interested in purchasing a Multi Function Meter for your sub – metering needs, don’t hesitate to reach out to us. We’re here to help you find the right meter for your requirements and provide you with the support and expertise you need for a successful installation.
References
- Manufacturer’s user manuals for Multi Function Meters
- Electrical installation standards and guidelines
Zhejiang Qunte New Energy Technology Co., Ltd.
As one of the most professional multi function meter manufacturers in China, we’re featured by quality products and good price. Please rest assured to buy discount multi function meter made in China here from our factory. We also accept customized orders.
Address: No. 56, Fengxi Road, Tang’ao Yu Village, Liushi Town, Yueqing City, Wenzhou City, Zhejiang Province
E-mail: 251951196@qq.com
WebSite: https://www.zjqtmeter.com/